Amazon Ride Guide
Here you will find all the important information for daily use – from vehicle use and operation to what to do in the event of an accident. We have compiled all the answers and guidelines for you. This allows you to start your everyday work safely and well informed.
Frequently asked questions
Useful tips for operating Ford Transit
Down left next to the steering wheel, pulling the switch labelled as: (P) Pushing the same switch releases the brake (1)
There is a rotary control/joystick to the left of the steering wheel, above the handbrake. Turn to the desired mirror and use the joystick to change the mirror position. (2)
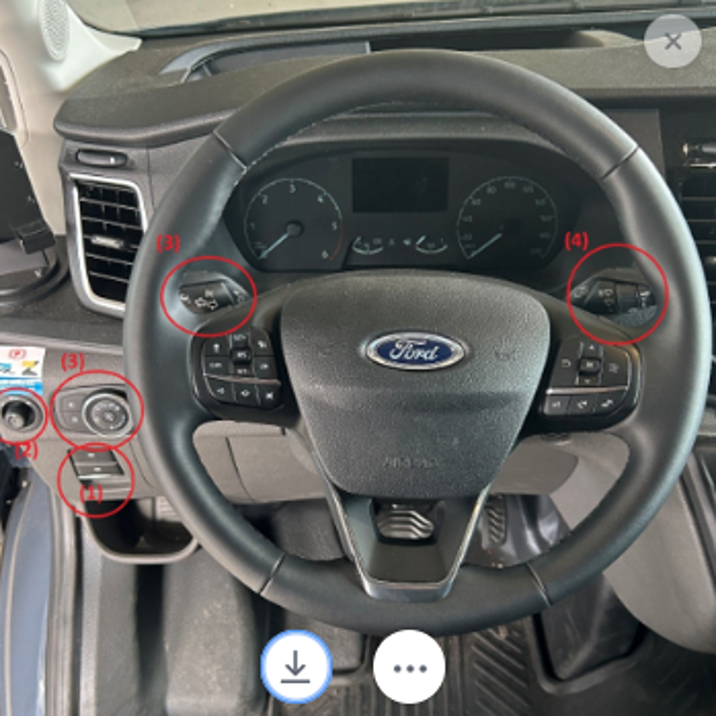
Down left next to the Steering Wheel, use desired lighting settings on the rotary wheel for the headlights
Left Lever on the steering wheel for turn signals.
There is a right lever on the steering wheel (4)
Move the gearshift to the right of the steering wheel. Press and hold the brake pedal and button on the gearshift to select gear. Button on the outer edge = P, Pushing up the lever = R, Pushing down the lever = D
Open the driver's door to access the small door for the fuel cap. There’s one for Gas and one for AdBlue. Follow the fuel tank instructions in the fuel cap! Note the dashboard instructions when to refill.
The correct distance to the steering wheel is when only the hands are behind the steering wheel with the arms outstretched. The height must be selected so that the on-board computer is fully visible to the driver.
For the Vehicle height there are warning stickers on the Windshield next to the inner rear-view mirror
The Blind Spot and lane activation warning is activated by default and can’t be turned off. In the event that these do not work, the on-board computer will display an error message when starting the vehicle. The lane departure warning can be turned off in the settings on the big navigation screen.
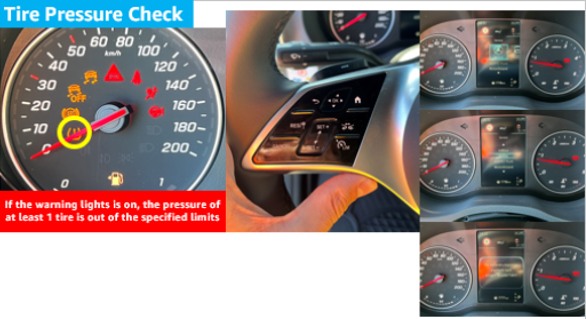
Petrol stations provide compressors with pressure gauges to measure this accurately when the air is refilled. In the event of an abrupt drop in pressure, the vehicle will display an error message in the on-board computer.
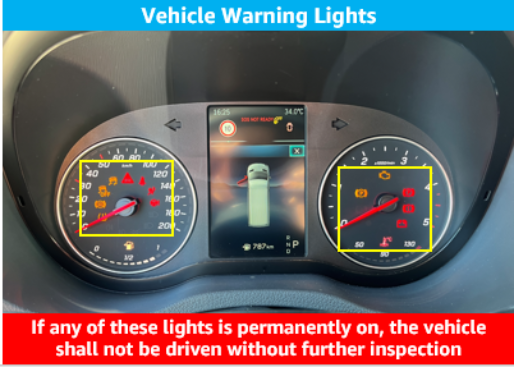
When the vehicle is started, it performs a self-test to ensure that all systems are working properly. In the event of an error message, this is displayed in words or symbols on the on-board computer. The explanations of the symbols can be found in the user manual in the glove compartment.
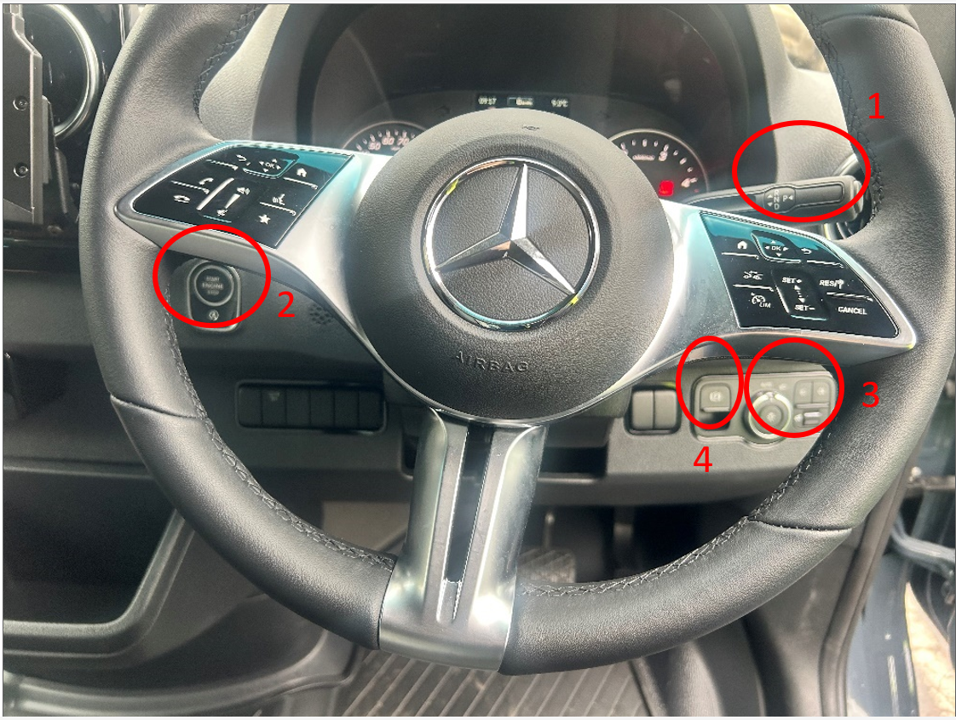
Useful Tips for operating MB Sprinter:
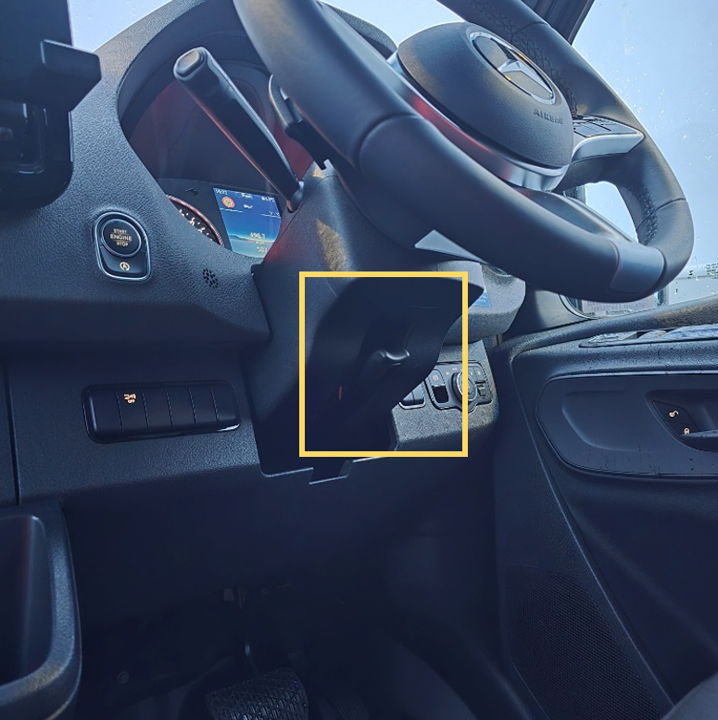
Pull button on the instrument panel which is found on the right side of the steering wheel.
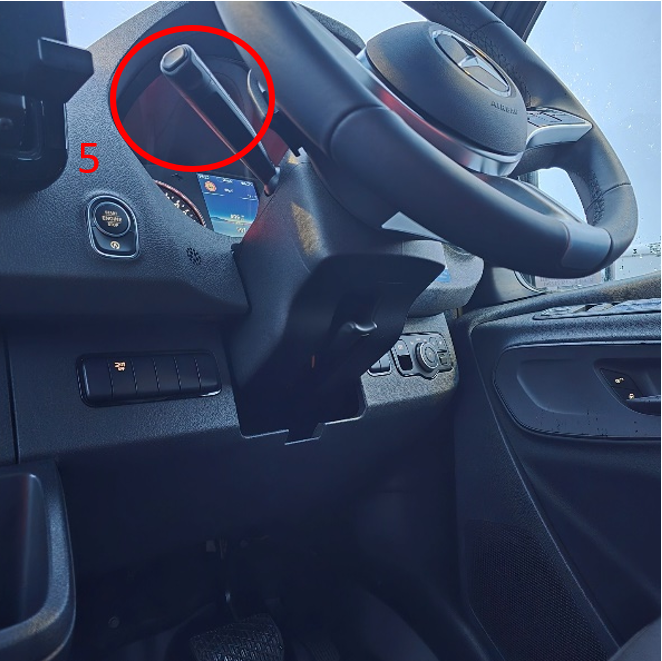
- Gear Shift Lever
- Ignition on/off
- Lights Control
- Electric Hand Brake lever
- Wipers/ High Beams, Turn Signal lever
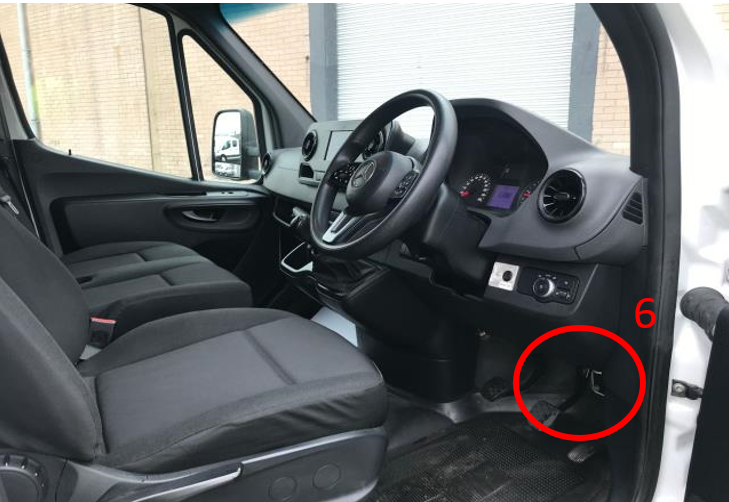
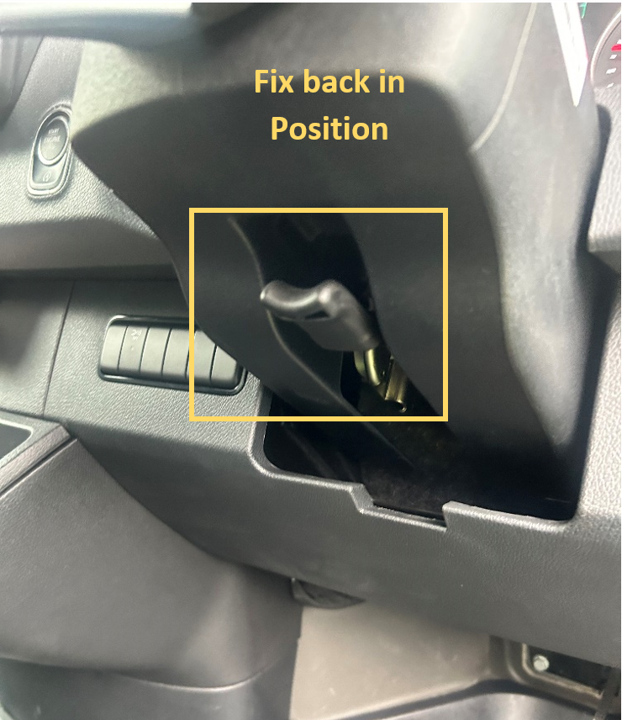
- Hood Opening lever
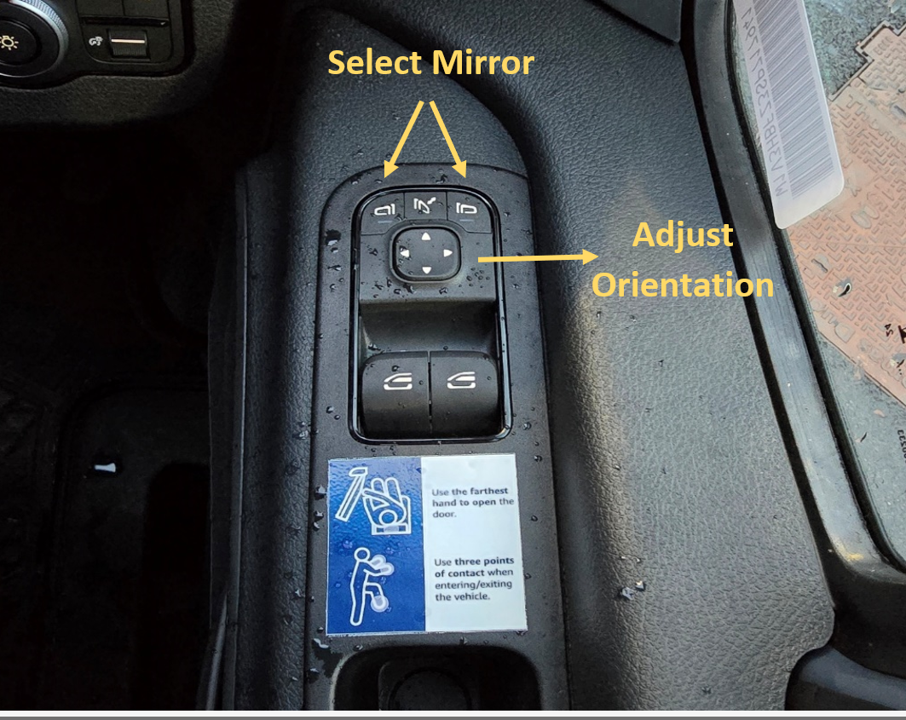
Use the controls located on the driver door's inner panel by first selecting the mirror you want to adjust, then moving its orientation using the arrows underneath.
Operate the lever located behind the steering wheel on the left side - move it up or down to activate the side turn indicators and move it forward or backward to activate the headlights.
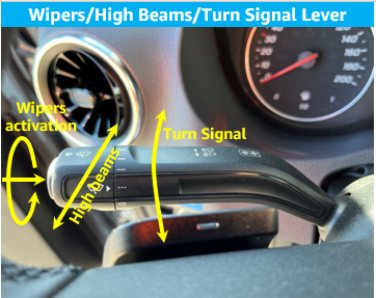
Use the lever located behind the steering wheel on the left side. Rotate the extremity of the lever to select the desired wiper activation frequency: auto, slow, medium, or fast.

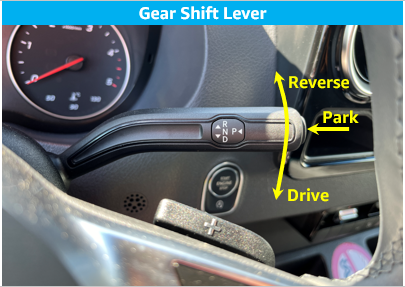
Press the brake with your foot, then move the lever on the right side of the steering wheel—move it up to engage reverse gear, move it down to engage drive, and press the button on the edge to engage park.
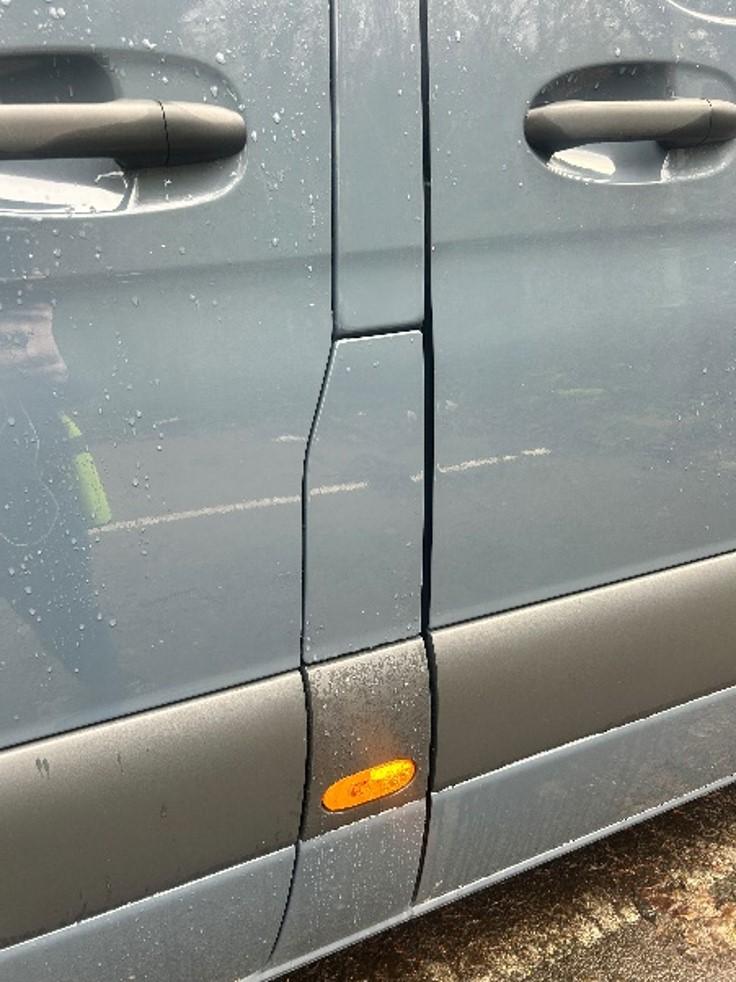
To release the fuel lid, first open the passenger (RHD) door, as the fuel lid is located on the B-pillar near this door, and then simply open the fuel cap.

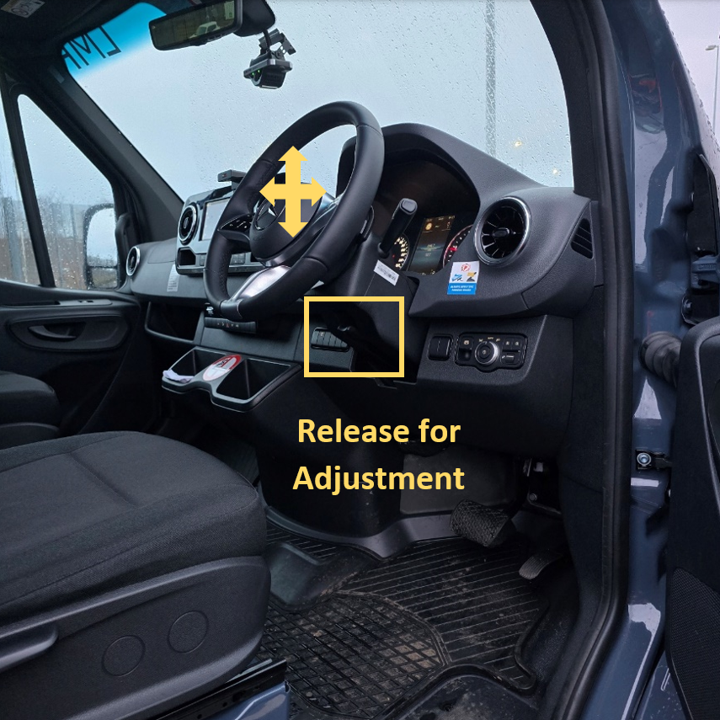
Position yourself comfortably in the seat with your back fully in contact with the backrest. Your right wrist should be able to touch the top of the steering wheel, and the steering wheel should not obstruct your view of the instrument cluster.
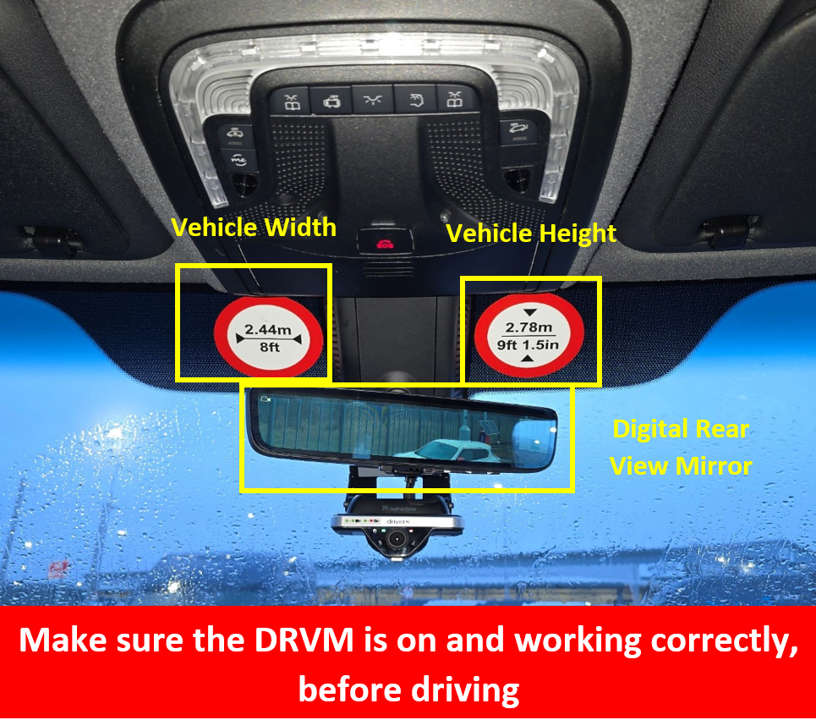
The vehicle has a clearance height of 2.78 meters. You can confirm this by referring to the safety height sticker located near the digital rearview mirror.
There is a specific warning light on the instrument cluster. Additionally, after a few minutes driving, it will be possible to check tyre pressure from the steering wheel controls (left side) by pressing Home-Service-Tyres.
To check for any warning lights, look at the instrument cluster where they are located within the speedometer and engine RPM displays.
Safety and Emergency procedures for vehicle use.
Any issues identified during the standard DVIC (Driver Vehicle Inspection Checklist) are flagged. Additionally, all LMR vehicles undergo a separate inspection, with clear instructions provided. Vehicles marked as grounded in the DVIC or inactive during the LMR inspection are not permitted to be used for routes.
First, ensure everyone's safety and call emergency services if there are any injuries. Once safety is confirmed, notify the LMR operator and DSP about the incident. Document damages on the booking platform and complete the accident form. Contact police if necessary to determine fault, and call the 24/7 towing service if the vehicle cannot be driven.
DSPs are provided with DKV fuel cards (also known as 'jolly cards') to refuel LMR vehicles, similar to how they refuel regular fleet vehicles. These cards were used during the LMR pilots and remain the standard method for fuelling LMR vehicles. For recharging electric vehicles, instructions are provided on using designated charging stations.
Simply go to the nearest gas station, refuel the vehicle, and use the provided fuel card for payment.
If you're unable to access the vehicle, contact the Field Point of Contact (POC) to investigate the issue and provide a spare key. All LMR vehicle keys have a key tag with the following information: 'LMR Vehicle', 'Plate #: XX-XX-XX', and 'If found, contact eu-lmr-escalations@amazon.com.
If a replacement vehicle is needed, the Field Point of Contact (POC) should be contacted to check availability. The Field POC will work to arrange a replacement vehicle. If none is immediately available, the POC will continue to search for an alternative solution.
Contact the LMR team about the key: amazonlmr@arval.co.uk
Contact the LMR team- will be an account manager which will be dealing with it
Vehicle Rental policies and best practices for DSPs
|
LMR vehicles are available to DSPs as a flexible resource to optimize operations and delivery capacity. DSPs are asked to treat these vehicles with care and adhere to the reservation period, ensuring all DSPs can benefit from the program. Failure to follow the outlined policies may result in loss of access to the LMR vehicles. |
If the vehicle you reserved is not available at the Delivery Station, please speak to the LMR dedicated Point of Contact (POC) or FTE. They will assist you in arranging an alternative vehicle for your use.
Reservation data is closely monitored, and any unfair use of the LMR program may result in losing access to the program. Additionally, any damages incurred during the reservation will be invoiced directly to the DSP.
Invoices for vehicle rentals will be issued on the 15th working day of the following month. For example, a van rented between September 1 and September 30 will be invoiced on October 15. This will cover any vehicle rentals that were closed out from the previous month.
Insurance costs are affected by the frequency of claims and accidents. Each time a claim is filed against an insurance policy, it can potentially lead to an increase in the policyholder's insurance premiums the following year. The more claims and incidents that occur, the higher the insurance provider's overall costs, which they may then pass on to policyholders through higher premiums/deductibles. Maintaining a safe driving record and minimizing claims can help keep insurance costs more manageable over time.
Arval: LMR users are required to report the vehicle's condition at the start and end of the rental period through the Arval Fleet Sharing app. Any damages that occur during the rental period should also be reported via the Arval Fleet Sharing app or the Arval Fleet Sharing booking platform. These practices help maintain transparency and support damage claims. By following these procedures, the LMR operator ensures responsible vehicle usage, preserves quality, and upholds accountability throughout the rental process.
- Stop the vehicle - Do not leave the scene, as that would be considered a hit-and-run offense.
- Exchange information:
- Obtain third party name and address.
- Obtain third party vehicle registration details if a vehicle is involved.
- Fill out an EU accident report (reports are typically located with all vehicle documentation in the glove-box)
- Take photos of damage to third party as well as photos of third-party vehicle license plate and any insurance stickers or discs on the windscreen (for countries where this is practice)
- If you are unable to obtain certain information, such as the third party's name and address (e.g., if the third party involved is a parked car):
- You are legally obligated to inform the police about the accident.
- Obtain an accident report from the police, which should be signed by you and sent to the On-Site Field Point of Contact.[RS1] This applies to all countries.
[RS1]This applies to all countries.